okay, wow.. at first I was really confused by the question but now I think I get it.
You're a guy, aren't you?

So you get some thread. I would personally use off white or maybe even tan because that doll is so faded your bright white threads would show. But if you think it's washable, go with white.
So you take your thread, and break off a really long piece. Like three feet worth.
Get a small needle.
See the eyelet in the top? Lick the thread tip and repeadedly try to stick the end through the hole. Once you get it (it might take one try, or it might take twenty) pull the thread until the needle is in the center and the two end pieces now meet underneath it. Basically, folded in half but with a needle in it.
You've now doubled your thread, meaning your stitches will be much stronger.
Take the two ends and tie them together. The thicker your knot, the better the chance is you have of it not slipping back through the thread holes.
Get as close to the end of the torn seam as you can, or maybe even a few milimeters before it to prevent it from ripping more. Keep it as close to the edge of the tear as you can so you don't lose part of the doll's neck, but make sure the fabric is strong enough to handle the stitching. If it's worn and frayed you're going to have to move down to thicker fabric and lose some neck. Begin threading from the INSIDE of the neck (that way your knot and tail will not stick out).
Pull the needle out of the neck from the outside and move it to the spot directly above your stitch, as close to the rip as you can but again, keeping it on solid fabric. Put needle in through the front and pull out from the inside.
Go back down to the neck and put the needle through from the inside again, as close to the first stitch as possible.
Tighten after each stitch so that the fabrics are aligned by your stitches.
Repeat until you've covered the entire thing.
At the end, loop the thread through and tie off with a small knot, as invisible as possible.
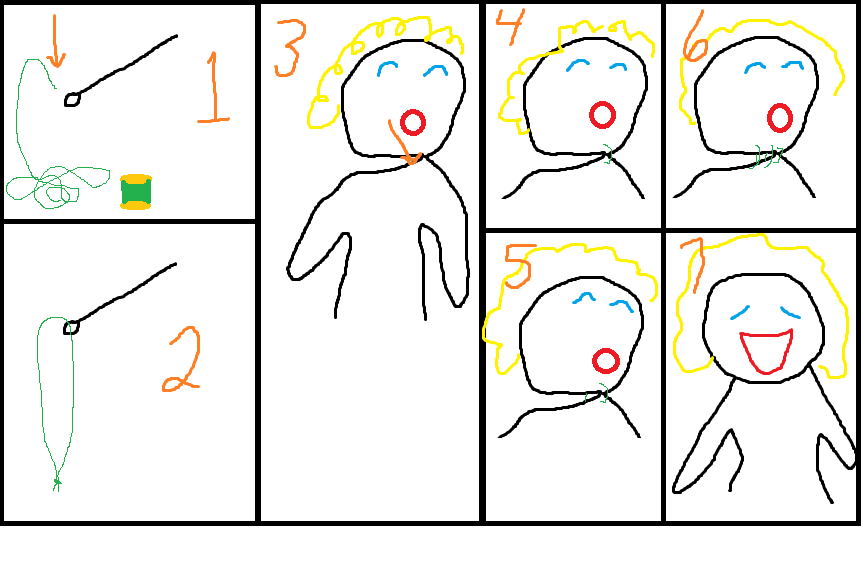
1. loop thread
2. tie off end
3. first stitch from inside of neck
4. go through outside of the head to the inside.
5. bring the thread back down from the inside to the neck again.
6. Repeat
7. Finished!
disclaimer: sewing will not cause your doll to fix her hair or change her facial expression.


